About Me

I grew up in the Blue Ridge Mountains of Virginia where I also attended college and met the love of my life. I lived in NYC for five years with my husband and Westie, Mack Brown before recently moving all the way across the country to Los Angeles. I'm an amateur chef, total foodie, lover of Westies, sports fanatic and self-proclaimed book worm. You'll find a little bit of all these things I love on this blog. And...most importantly, I'm a new mom to the most precious baby boy, Austn Robert, born this past October.

Amanda

Amanda

Brad

Brad

Austin Robert

Austin Robert

Mack Brown

Mack Brown

Thursday, September 27, 2012

Beef Bulgogi


I have no idea why this dish is named Beef Bulgogi, and I have even less of a clue as to what bulgogi means, but I do know that this dish is de-licious.  I first found the recipe in my all-time favorite cookbook, Everyday Food: Great Food Fast, a few years ago, and I have been making it ever since.  

It's basically a Korean beef stir fry.  I serve it the traditional way, with lettuce wraps, but I'm sure it would also be great with rice on the side.  The recipe calls for hot chile sesame oil, but if you can only find plain sesame oil, that works too.  Just add about 1 tsp. of red pepper flakes to the oil to give it a kick.  Since I'm cooking for two, I only use 1 lb. of steak, but the original recipe calls for 1-1/2 lbs. and is supposed to feed four.  Although, you might want to add another green pepper as well if you're cooking for more than 2.  No need to increase the marinade though, it will go a long way.


Beef Bulgogi

1 lb. sirloin or rib-eye steak, 
trimmed & cut into into slices about 1/8-in thick
1/4 cup soy sauce
1 tbsp. hot chile sesame oil
2 tbsp. brown sugar
6 garlic cloves, minced
1 tbsp. peeled, fresh ginger, minced or grated
2 red onions, cut into 1-in. wedges
1 green bell pepper, cut into strips
4 tsp. vegetable oil
1 small head butter lettuce

Start by making your marinade.  In a small bowl, combine the soy sauce, hot chile sesame oil, brown sugar, garlic and ginger.  Stir to combine.  Set aside.

Cut up your vegetables and your steak.  Put the vegetables in one bowl with half of the marinade and the steak in another bowl with the remaining marinade.  Allow the meat to marinate in the sauce for 15 minutes.

While the meat is marinating, heat a large skillet over medium-high heat.  Add 2 tsp. of the vegetable oil.  Add the vegetables.  Saute for 5 to 6 minutes.  Remove the vegetables from the heat and set aside.

Add the remaining 2 tsp. of the vegetable oil to the skillet.  Toss the meat into the skillet and cook for 3 to 4 minutes, or until the beef is just cooked through.  

Once the beef is cooked, add the vegetables back into the skillet.  Toss everything together to combine, and cook for another 2 minutes or so.

Serve with butter lettuce leaves or rice.

Wednesday, September 26, 2012

Baby H's Nautical Nursery


I'm finally ready to share pictures of Baby H's nursery with you!  I've had so much fun over past few months planning and putting together this special space for our boy, and I think he's really going to love it.

I currently have an obsession with the color blue, which helped lead me toward a nautical theme for the room, but I also wanted a color palette that could easily be reworked for a girl, if we are blessed with more babies down the road.  So I started with navy blue as my color inspiration, and the nautical theme just kind of fell into place from there.

I tried to create a warm and functional space for me, Brad, and the baby that looked like a nursery, but had elements that could also grow with Baby H into toddlerhood and even childhood.  Below the pictures at the bottom of the post I've included a guide with links to where we purchased most of the things you see in the nursery, just in case you love something you see!

Also, this post wouldn't be complete without another huge thank you to my mom.  This room truly wouldn't look the same without all her help.  Thanks again, Mom!!

Let me know what you think!


Yes, there is a missing rope letter on the wall.  I didn't want to give away his first name initial.
You'll just have to wait until he's born to find out :)

The king of the nursery. 

Quilt & Crib skirt: Harper Nursery Bedding Set, Pottery Barn Kids
Crib Sheet: Row Your Boat Crib Fitted Sheet, Pottery Barn Kids
Sailboat Mobile, Pottery Barn Kids {no longer available}
Rocker: Klaussner Marlowe Nursery Rocking Chair, Flores Surf, Baby Supermarket
Pillow: Handmade by my mom, fabric purchased from Mood, pillow insert from Ikea
Curtains: Henny Rand, Ikea
Bookshelves: Bekvam Spice Rack, Ikea {we painted them Marine Blue by Benjamin Moore}
Dresser: Catalina Dresser, Sun Valley Espresso, Pottery Barn Kids
Shelf: Hampton's Peg Rack, Pottery Barn Kids {no longer available}
Basket: Caitlin Tote Basket, World Market
Vintage Nautical Anchor Print, Little Red Flag, Etsy
Cross-stitch Sailboat picture & frame: handmade by Brad's mom, once hung in Brad's nursery :)
You Are My Sunshine Print, Lily Gene, Etsy
Sailboat, Hobby Lobby
Sailboat Wall Art {set of 4}, Paper Llamas, Etsy
Rope Letters, Alaska Rug Co., Etsy
Frames: World Market, Target & Amazon

*The bench, side table, cloth drawers, and lamps are all pieces of furniture we already owned.  Yay for repurposing!


Tuesday, September 25, 2012

Ginger-Roasted Chicken with Bok Choy & Broccoli


I'm really into roasted chicken lately, and this is another great way to prepare it.  It's roasted chicken with an Asian-flare.  This recipe packs a lot of flavor with very few ingredients, and very little prep.  Plus, it makes a perfect meal for two, or can easily be doubled or even tripled for company.

Ginger-Roasted Chicken with Bok Choy & Broccoli


2 chicken breasts, bone-in, skin-on
{approximately 1 lb. total}
1 tbsp. ginger, minced
2-3 garlic cloves, minced
1/2 tsp. salt
1 tbsp. extra virgin olive oil

1 medium head of bok choy, 
{stems cut off and chopped into 1-in pieces}
1 small head of broccoli, 
{cut into florets}
sesame oil
1/4 cup water
2 tbsp. soy sauce

Preheat the oven to 450 degrees.

In a small bowl, mix together the ginger, garlic, and salt.  Place the chicken on a rimmed baking sheet.  Lift up the skin of the chicken, and spread the ginger-garlic mixture evenly underneath the skin of both breasts.  Add the olive oil to the small bowl with any of the remaining ginger-garlic mixture.  Brush the olive oil overtop the chicken breasts.  Sprinkle with salt and pepper.  Roast the chicken in the oven for 45-50 minutes.

When the chicken has about 15 minutes left to cook, drizzle approximately 1 tsp. of sesame oil in a large skillet on medium-high heat.  Add the broccoli, bok choy and water.  Cover and cook for 6-8 minutes.  Remove the broccoli and bok choy from the heat, and add the soy sauce.  Toss to coat.

Serve the chicken, broccoli and bok choy with brown rice on the side.


Monday, September 24, 2012

Menu Mondays


Last week's menu ended up being a bit of a fail, which happens every once in a while, especially when I'm trying out a lot of new recipes.  That's why I didn't share many recipes with you last week.  I only like to give you the best :)  So, in an effort to improve from last week, I put together a menu for this week of both old favorites AND newbies.  And, hopefully, I'll find some yummy new recipes to share with you!


Here's what we're eating this week:

Monday
Ginger-Roasted Chicken with Bok Choy & Broccoli

Tuesday
Beef Bulgogi with Lettuce Wraps

Wednesday
Slow Cooker Honey-Sesame Chicken with Roasted Green Beans

Thursday

Friday
Slow Cooker Beef, Black Bean & Zucchini Chili


Saturday, September 22, 2012

Welcome, Fall!


I love this time of year.  It's easily my favorite season.  Last year, I shared with you some of the reasons I love fall so much, so this year I thought I'd put together a short Fall To-Do List.  

Hopefully, we are experiencing one of the last heat waves of the year in Southern Cali, and some cooler temperatures will roll in soon.  But, while I'm waiting for this cooler days, here are some ways I plan to celebrate my favorite time of year:

*go to an apple orchard
*make an apple upside down cake
*carve pumpkins
*make pumpkin-chocolate chip brownies
*drink warm apple cider
*wear colored jeans for the first time
*HAVE A BABY :)
and...
*celebrate baby's first Halloween & Thanksgiving

What are your plans for the fall?


Thursday, September 20, 2012

Date Night


With the baby coming soon, Brad and I have been trying to get out and about while spending as much time together as possible.  One of our favorite traditions is our version of "date night."  For our date nights, we usually just stay at home, have a "picnic style dinner" on the floor, and rent a movie we've been wanting to see.  We truly treasure these special moments spending time together at home without the busyness of life surrounding us.  Plus, when we stay home, Mack gets to tag along :)

For this date night, I put together a small gift from me and Baby H to give to Brad.  I wanted to thank him for being such an amazing husband through my pregnancy so far, and I wanted to let him know what an amazing father is going to be.  One of my favorite sayings is "Don't marry a man unless you'd be proud to have a son just like him."  Check and check.


So, I put together a "daddy diaper bag" full of things from me and the baby.  I wrapped each one, and wrote a little clue on the outside as to what might be on the inside.  Each thing inside was meant to help Brad and the baby bond in some special way.  I included: a Giants outfit, a Knicks outfit, and a Texas outfit all for the baby to wear while he and Brad root on their favorite teams; a knitted Mickey hat so that Brad can share his love for Walt Disney and all things magical with the baby; a board book called Daddy Kisses for Brad and the baby to read together; and a book just for Brad called Pacify Me: A Handbook for the Freaked-Out New Dad, just in case :)


I assembled a cheese platter with some of our favorite cheeses to snack on, and for dinner we had turkey and bean chili {one of our favorites}.


Brad also surprised me with a push present {for the record, I didn't even know he knew what a push present was, and, yes, we know I haven't technically pushed out a baby yet, but Brad said he wanted me to be able to enjoy it before the baby came as well as after}, a beautiful ring I've had my eye on, and then we snuggled up on the couch and watched Snow White and the Huntsmen.


All in all, the perfect night.

Tuesday, September 18, 2012

Turkey & Bean Chili


We LOVE chili in our household.  There really aren't many dishes that go better with the dropping temperatures outside {although in SoCal, we are still waiting for those....ahem} and/ or some FOOTBALL.  Last Christmas I shared with you all my Texas chili recipe, and it is still, hands-down, our all-time favorite chili, but this recipe for Turkey & Bean Chili that I'm about to share with you is a close second.  It is much less involved that my Texas chili recipe, much healthier, and takes far less time to prepare.  Honestly, this is a chili you can have ready in 30 minutes or less.  Of course, it's far better the next day, as most chilis are, but that's the beauty of chili.  You can make it ahead of time.  And, aside from the ground turkey, you probably already have all the ingredients in your pantry and fridge.  I love dishes like that!

I actually made this chili, per Brad's request, last Friday for a at-home date night we had planned.  More on our Friday date night coming tomorrow!

Turkey & Bean Chili

1 tbsp. extra virgin olive oil
1 onion, chopped
1 green bell pepper, chopped
2-3 cloves garlic, chopped
1/2 lb. dark ground turkey meat
2 tbsp. tomato paste
1 tsp. cumin
1/2 tsp. chili powder
1 {28 oz.} can diced tomatoes
2 {15 oz.} cans kidney beans, drained and rinsed
1/2 cup to 1 cup water {depending on how thick you like your chili}
salt and pepper, to taste

In a large pot or dutch oven, heat the oil over medium-high heat.  Add the onion and bell pepper.  {Add salt and pepper to taste.} Saute for 4-5 minutes.  Add the garlic, and saute until fragrant.  Add the turkey, breaking it apart with a spoon, and cook until it's no longer pink. {Again, add salt and pepper to taste.}

Once the turkey is cooked-through, add the tomato paste, cumin, and chili powder.  Stir everything together.  Next, add the remaining ingredients: the tomatoes, the beans, and the water.  Bring everything to a boil, before turning the heat down to a low simmer.  Adjust the seasoning, if needed.  Allow the chili to simmer for at least 15 minutes.  The longer it simmers, the more the flavors meld, and the better it tastes, so leave it on a little longer if you have time.  Just keep the heat low so all the the liquid doesn't completely evaporate!

Serve with sour cream, shredded cheese, tortilla chips, cilantro and/ or sliced jalepenos.  

Monday, September 17, 2012

Menu Mondays


Here's what's we're chowing down on this week...

Monday
Zucchini Lasagna

Tuesday

Wednesday
Dinner out with friends

Thursday
Slow Cooker Red Beans & Rice

Friday
Ginger-Roasted Chicken with Bok Choy & Broccoli

What's on your menu for the week?

Friday, September 14, 2012

One Pot Meal: Pan Roasted Chicken with Lemon Garlic Green Beans


In addition to auditioning slow cooker meals, I've also been on the look out lately for one pot meals.  Hopefully by the time Baby H makes his arrival, I'll have a list of at least 10 easy, quick meals that Brad or I can fix for dinner.  If you have any slow cooker or one pot meals that you love, send them my way!

This meal was positively delicious.  The chicken remained so moist, the lemons on the bottom of the pan added a perfect boost of flavor, and the skin on top of the chicken got perfectly crispy.  You could easily throw this meal together in the morning before work, and then just put it in the oven once you get home.  Or, make it and take it over to a good friend or family that could really use a prepared home cooked meal.  All they have to do is toss it in the oven once they're ready to eat!

*This recipe serves 2, but just double everything if you want to increase the number of servings :)

Pan Roasted Chicken with Lemon Garlic Green Beans

2 chicken breasts, bone-in, skin-on
1 lemon, sliced
7 tbsp. extra virgin olive oil
4 garlic cloves, minced
3/4 lb. green beans, trimmed
8 red potatoes, quartered
salt and lemon-pepper

Preheat the oven to 450 degrees.

In a small baking dish, add one tablespoon of oil and spread evenly throughout the dish.  Add the lemon slices in a single layer to the bottom of the dish.

In a large bowl, add the remaining 6 tablespoons of oil, the minced garlic, 1 tsp. of salt, and 1/2 tsp. lemon-pepper.  Mix together.

Add the green beans to the bowl.  Toss.  Using a pair of tongs, remove the green beans from the bowl, and layer them evenly on top of the lemon slices.

Add the potatoes to the bowl.  Toss.  Using a pair of tongs, remove the potatoes from the bowl.  Place the potatoes along the inside edge of the baking dish.

Finally, add the chicken breasts to the bowl.  Toss.  Using a pair of tongs, add the chicken breasts {skin-side up} on top of the green beans, in the middle of the baking dish.  Rub any extra oil and garlic left behind in the bowl on top of the chicken.  Sprinkle with a little extra salt and lemon-pepper.


Roast in the oven for 50 minutes.  Once the timer goes off, remove the chicken from the pan and put the vegetables back in the oven for an extra 10 minutes.  


Once the vegetables are done, serve everything all together, and your dinner is ready!

Recipe adapted from Real Simple

Thursday, September 13, 2012

Slow Cooker Tortilla Soup with Pork & Butternut Squash


Here's another slow cooker recipe that was a huge success.  The addition of butternut nut squash makes the soup both decadent, and perfect for fall.

To be fair, if you look closely at the picture of the soup I made you will notice a lack of tortilla.  This wasn't intentional, and when we have leftovers I will be adding homemade tortilla strips.  BUT we had a bit of a sink emergency the other night, and I wasn't able to get into my kitchen for a couple of hours right around dinner time.  Needless to say, once the maintenance man left, B and I both were starving, so we I guess we technically had tortilla-less soup last night.  It was delicious none-the-less!

Slow Cooker Tortilla Soup with Pork & Butternut Squash

2 lb. pork butt or pork shoulder, fat trimmed and cut in half
1 small butternut squash, peeled, seeded and cut into 1-inch pieces
1 {14.5 oz.} can diced tomatoes
1 jalepeno pepper, seeded and sliced
2 cloves garlic, whole
1 tbsp. chili powder
1 1/4 tsp. salt
4 cups water


In a 4-to-6-quart slow cooker, combine the pork, squash, tomatoes, jalepeno, garlic, chili powder, salt and water.  Stir everything together before putting the lid on the slow cooker.

Cook on low for 7 to 8 hours, or on high for 5 to 6 hours.

Serve with tortilla strips (homemade or store-bought), sour cream, cheese, cilantro, radishes, and/ or wedges of lime.

*Next time I make this I may try frozen butternut squash to save myself a little time.  If you want to try frozen butternut squash instead, you will most likely need 2 {16 oz.} bags.  Let me know if you try it, and how it works out!

Recipe adapted from Real Simple

Wednesday, September 12, 2012

36 Weeks


With only four weeks to go I feel like we've really entered the home stretch.  We still have lots of little things to do before his arrival {like get the car seat installed....which come think of it, isn't such a little thing}, but we are beyond excited to meet our little man soon!!


Week 36 Pregnancy Highlights:

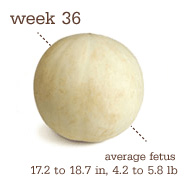
*According to TheBump, Baby H is around the size of a honeydew this week.  And, according to the doctor yesterday, he's probably somewhere around 6 lbs. already, so he's right on track!

*Baby H continues to love my right side and camps out there most of the time.  I love feeling his little kicks and squirms, but this has brought back the side pain {which we now think is actually rib pain}, from time to time.  

*I've had some minor swelling in my feet, which I think has mostly been due to the heat, but overall nothing major, which is great!  My wedding rings have started to get a little tight and itchy {again...thank you heat}, so they are off for now, but hopefully they'll make a return soon.

*Since my last post, we were thrown an amazing surprise shower for Baby H {which you can read about here} and my mom came to visit a couple weeks ago and was a tremendous help in the nursery {you can read about her visit here}.  And, I'm ALMOST ready to reveal the nursery!

*I'm quickly running out of clothes that fit me.  Brad finds it amusing.  I do not.  Thank goodness for the few very long maternity tanks I have that help cover up what my shirts do not.

*Also, I'm obsessed with frosted mini wheats right now, preferably the Whole Foods brand.  Seriously, I could eat them for every meal, with or without milk, it makes no difference.  They. are. delicious.

*And of course, Baby H has been cheering his Horns onto victory the past two weeks along with mommy and daddy.  We can't wait until he's actually here to watch a game with us {and get all dressed up!}.  Hopefully, he'll be more of a football fan than Mack Brown!!  Hook 'em!


Tuesday, September 11, 2012

Pork Chops with Rainbow Chard & Beans


This is one of those hearty, filling, meat 'n potatoes kind-of-meals.  Minus the potatoes, of course.  It's also a great recipe to help transition your cooking repertoire into fall mode.  Plus, prep time included it only takes 30 minutes to prepare, and only dirties one pot.  A definite win-win in our household!

The recipe below will serve 4, but if you're only cooking for 2 just halve the recipe.  I actually halved everything pork related and left the rainbow chard and beans ingredients the same, since we like a little extra veg on our plates, but if you just want to half everything, you'll still have plenty!

Here's what you do...

Pork Chops with Rainbow Chard & Beans

4 boneless, skinless pork chops
1 tsp. smoked paprika
salt and pepper
2 tbsp. extra virgin olive oil
1 bunch rainbow chard, stems removed and leaves chopped
1 medium onion, sliced thinly
1 can cannellini beans, drained and rinsed
2 tbsp. red wine vinegar
a pinch of red pepper flakes

Before you start cooking, prepare the pork chops.  Salt and pepper the chops to taste, and evenly sprinkle on the paprika.  

Warm a large skillet to medium-high heat, and add 1 tbsp. of the oil.  Add the pork chops and cook 4-5 minutes per side, depending on the thickness.  {My pork chops were about 1 in. thick, and I cooked them 4 minutes per side.}  Once the pork is fully cooked through, remove them to a plate and cover with tin foil. 

Add the remaining olive oil to the same pan, and toss in the onions.  Add salt to taste, and stir the onions around helping them pick up some color from the juices left behind by the pork chops.  Cook the onion for about 3 minutes, or until they are softened.  Add the chard and a little more salt.  Allow the chard to wilt, stirring occasionally.  Once the chard is wilted, add the beans, red wine vinegar and a pinch of red pepper flakes.  Stir everything together, allowing the beans to heat through.  Remove the chard and beans from the heat, and serve alongside the pork.

Monday, September 10, 2012

Menu Mondays


Here's what we are eating this week:

Monday
Pork Chops with Chard & White Beans

Tuesday
Slow Cooker Tortilla Soup with Pork and Butternut Squash

Wednesday
Roasted Chicken with Lemon-Garlic Green Beans

Thursday
Leftovers

Friday
Turkey & Bean Chili

What's on your menu for the week?

Friday, September 7, 2012

Crispy Breaded Shrimp with Garlicky Beans


Here's another simple and delicious shrimp recipe.  This is one that I had almost forgotten about until yesterday, and when I rediscovered it, I knew immediately what I was going to make for dinner.  And, I'm so glad I did.  Thirty minutes, and you're done.  Perfection.

This recipe will serve 2 hungry people with some leftovers.  For 3-4 people, I would increase the amount of shrimp from 1 lb. to 1 1/2 lbs.  You should be able to leave the rest of the shrimp recipe the same.  You may want to double all of the ingredients for the garlicky beans.

Crispy Breaded Shrimp with Garlicky Beans

1 lb. medium-sized shrimp, peeled and deveined
1/2 cup whole wheat bread crumbs
1 tbsp. herbes de Provence
1/2 tsp. salt
1/4 tsp. pepper
5 tbsp. extra virgin olive oil
2 garlic cloves, chopped
1 can of cannellini beans, drained
1/4 cup water
1/2 pint cherry tomatoes, halved
4-5 oz. baby spinach


Preheat the oven to 400 degrees.  Lightly oil a medium-sized cookie sheet.

In a large bowl, add the shrimp, bread crumbs, herbes de Provence, salt, pepper, and 3 tbsp. oil.  Gently toss everything together, completely coating all the shrimp.  Arrange the shrimp in a single layer on the prepared cookie sheet.  Cook the shrimp for 12 minutes.

While the shrimp are cooking, heat the remaining 2 tbsp. oil in a large skillet over medium-high heat.  Add the garlic, and cook for 30 seconds, or until fragrant.  Add the beans and water.  Cook for 3 minutes.  Once the liquid has slightly thickened, add the tomatoes.  Cook for another 2 minutes.  Add the spinach and cook until just wilted.  Add extra salt and pepper to taste.

Serve the shrimp and garlicky beans together immediately.

Recipe adapted from Real Simple

Thursday, September 6, 2012

Thanks, Mom!


I have the most amazing mom.

She flew all the way out to California last week to help me finish prepping the nursery for Baby H's arrival, and I couldn't have been more thankful.  We literally worked on the nursery the entire time she was here, and I know she was exhausted, but she never complained once.

Thank goodness she came too because, I'm the first to admit, there are things that I'm good at, and there are things I'm not.  For example, I had a pretty exact vision for the nursery and how I wanted it organized, but many of the projects I had planned were only made possible by my mother.  Somehow the crafty gene slipped right on past me.  I can't sew, I hate painting, and hanging things on a wall...forget about it.  Mom to the rescue, in all categories.

While she was here we designed, and she sewed a pillow for the bench in the nursery.

The fabric we chose

Mom hard at work

She painted and hung shelves for books.

Mom hard at work {again}

Me "supervising" and avoiding the pain fumes

She hemmed and hung curtains.

She hung pictures.  

She rearranged furniture.  

We washed loads of baby clothes, and blankets, and burp pads, and bibs.  We put together overly complicated baby gear.  We laughed.  We talked.  We made memories.  We truly had a great time.  And, we ALMOST completed the nursery.  I just have a few finishing touches to add before it will be ready for its blog reveal!

So, thank you again for coming, Mom.  Brad and I are beyond grateful for your help.  Baby H's nursery truly wouldn't be the same without you.  We love you!

Wednesday, September 5, 2012

Grilled Chicken & Orange Skewers


This is one of those perfect meals that is absolutely delicious with minimal effort.  Especially, if you have a grill master living with you {thanks, B!}.  On a side note, we've been watching a huge spider build a pretty impressive web outside on our patio for a couple of days now.  Brad, who loathes spiders, insisted on making a special trip to the store last night for "spider spray" {as he called it} before he would set foot on the patio to cook.  Ha!  Poor spider.

If you grill skewered meats often, I suggest investing in some metal skewers.  Wooden skewers work just as well, but make sure you soak them for a bit before loading them up and throwing them on the grill.  Otherwise, they'll catch on fire.

I served this with grilled zucchini on the side, but any vegetable or side dish will work.  Just make sure whatever you make to go with your grilled chicken and orange skewers doesn't take longer or require more effort than the skewers themselves :)


Grilled Chicken & Orange Skewers

1 1/2 lbs. boneless, skinless chicken breasts, cut into large 1 1/2 in. pieces
1 red onion, cut into wedges
1 orange, cut into 16 pieces
1/2 tsp. cumin
1/4 tsp. cayenne pepper
3/4 tsp. salt
1/4 tsp. pepper

Heat the grill on medium heat while you are assembling the skewers so that you can toss them on as soon as your ready.  Spray lightly with cooking oil.

In a large mixing bowl, add the chicken, onion, orange, cumin, cayenne, salt and pepper.  Gently toss everything together, making sure the chicken, orange pieces, and onion get evenly coated.

Begin assembling your skewers.  Alternate chicken, onion, and then orange, including about 3 orange pieces per skewer.  This recipe should yield approximately 8 large skewers.  So, I would say the recipe serves 3-4 people, depending on how hungry you are!


Grill the skewers, turning occasionally, until the chicken is cooked all the way through and the onion is slightly softened.  This should take about 15-18 minutes.  Remove the skewers from the grill, and serve immediately.

Tuesday, September 4, 2012

Five


It's hard to believe, but this little guy turned 5 yesterday.


And, he was royally spoiled all. day. long.

Car ride to pick out a birthday treat

Excited by all the options

Celebrating with a Drooley Dream Bar from Three Dog Bakery


Happy Birthday, Mack Brown!!